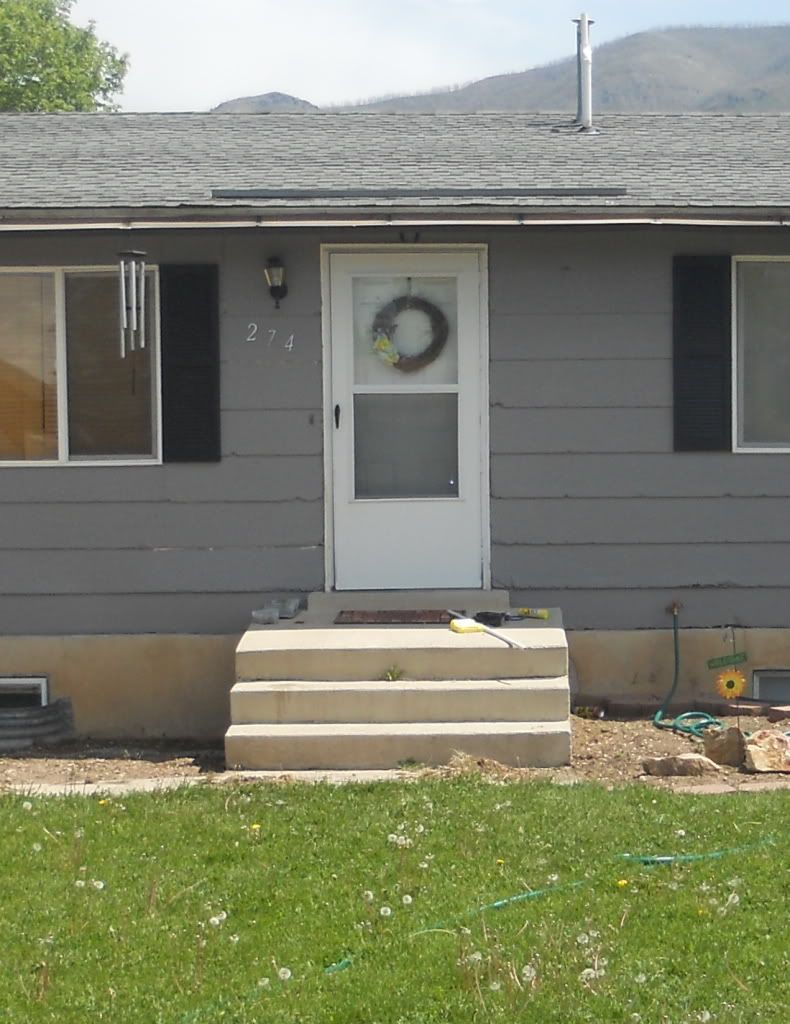
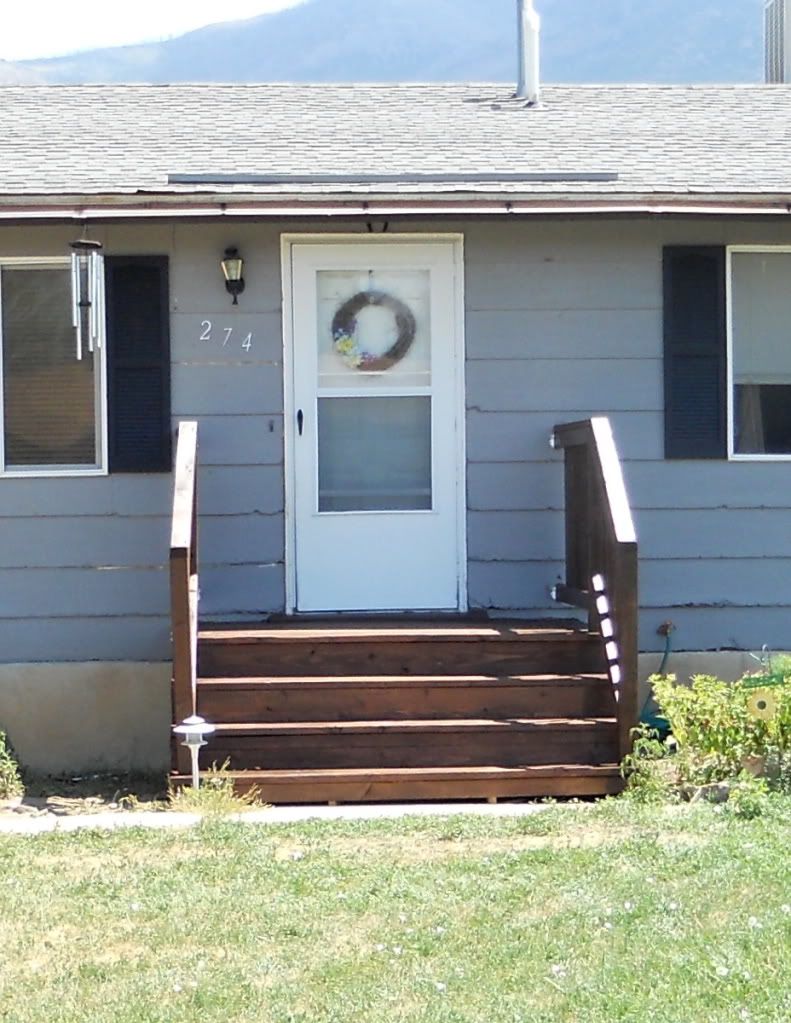
Thursday, August 9, 2012

Building a Porch

Pin It

BEFORE:


AFTER:


Our previous porch was at a 6% slope.  That's a bad slope, just ask semi drivers!  And the few people who have fallen down our steps because of it's slope...  With winter coming up when I will be oober pregnant, we decided to fix the porch so I wouldn't fall down it.  We also wanted to do it before school starts for Josh.  So here's how we did it:

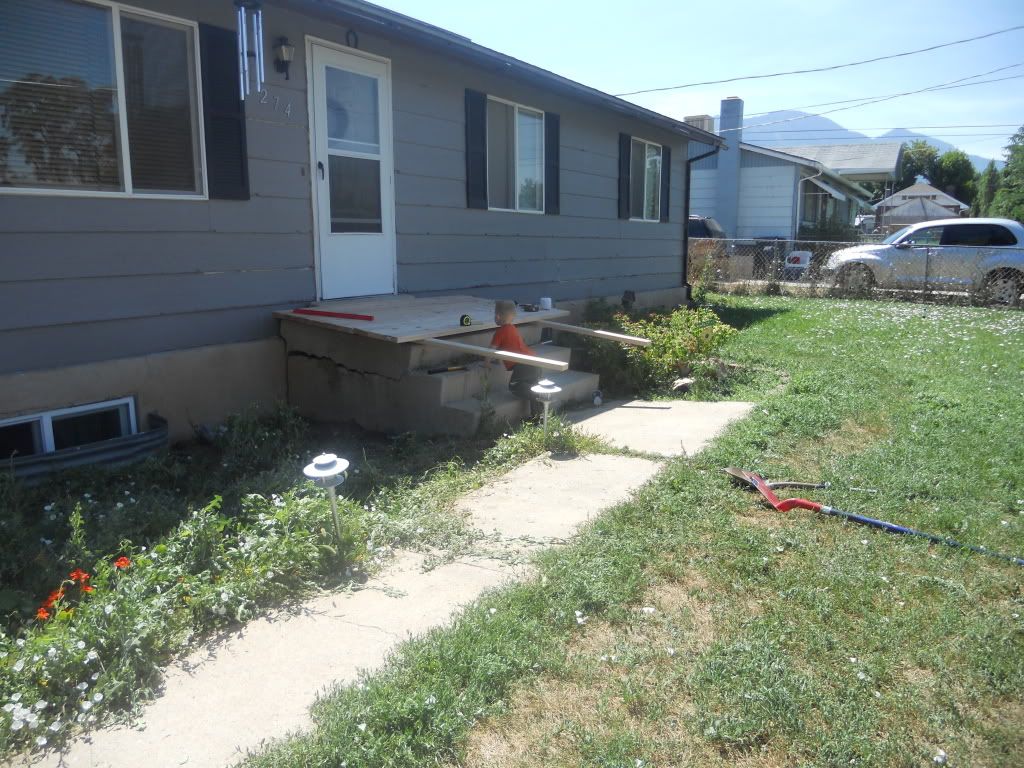
We decided to build over it.  This is Quinn figuring out where to put the posts for us :P

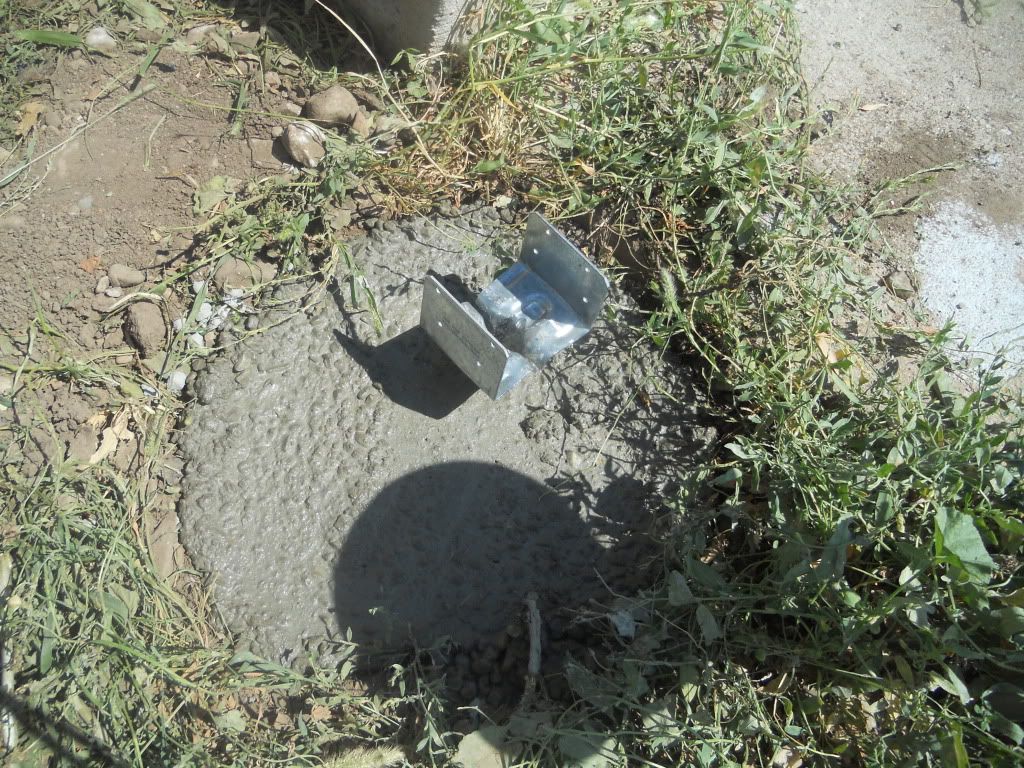
Josh dug holes for these neat deck post holders (they'll keep the wood off the ground, helping them last longer).  It took forever to make sure they were in the right place, and to dig through our rocky soil.  So we started Thursday night, and got two holes dug and filled with concrete.  The next morning we did the next two.

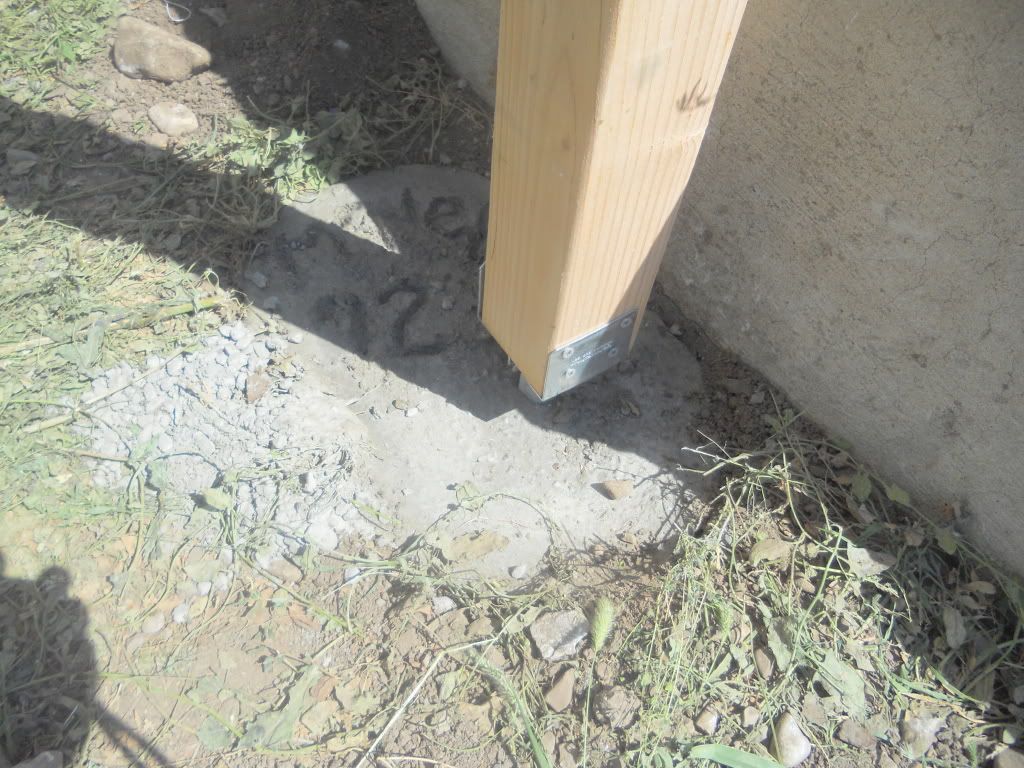
Once the concrete was cured, we were able to put in the posts - and yes, we wrote our name in the cement :)

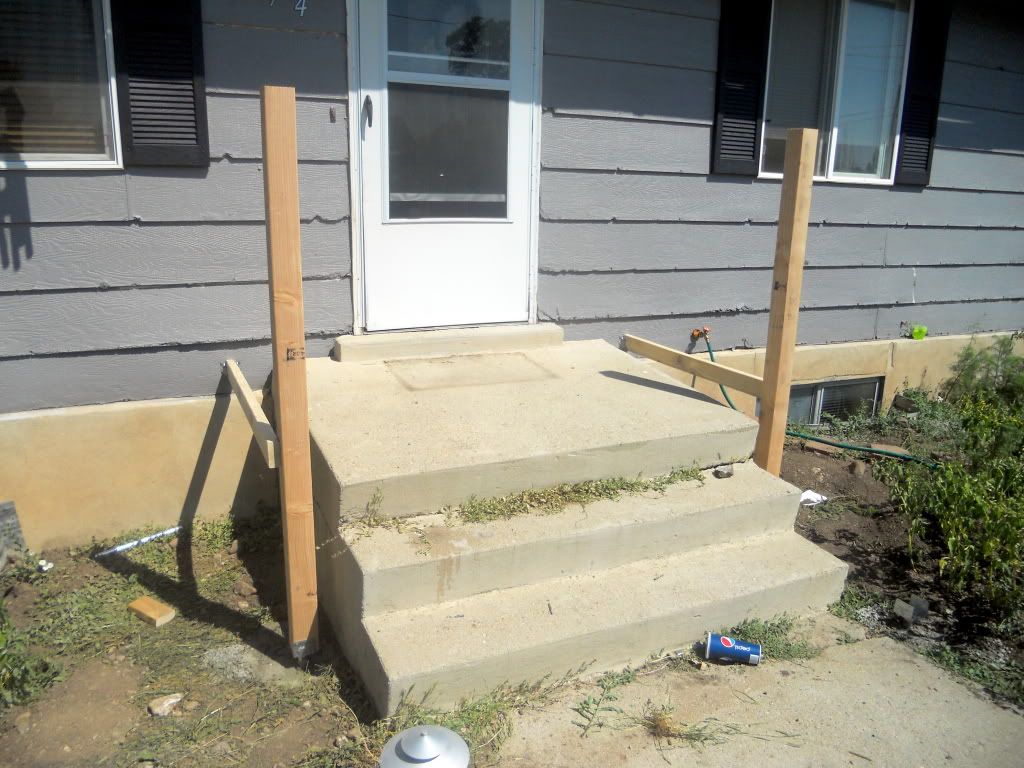
Once those were in, square to the house, and cut to the right height, this is how it looked:

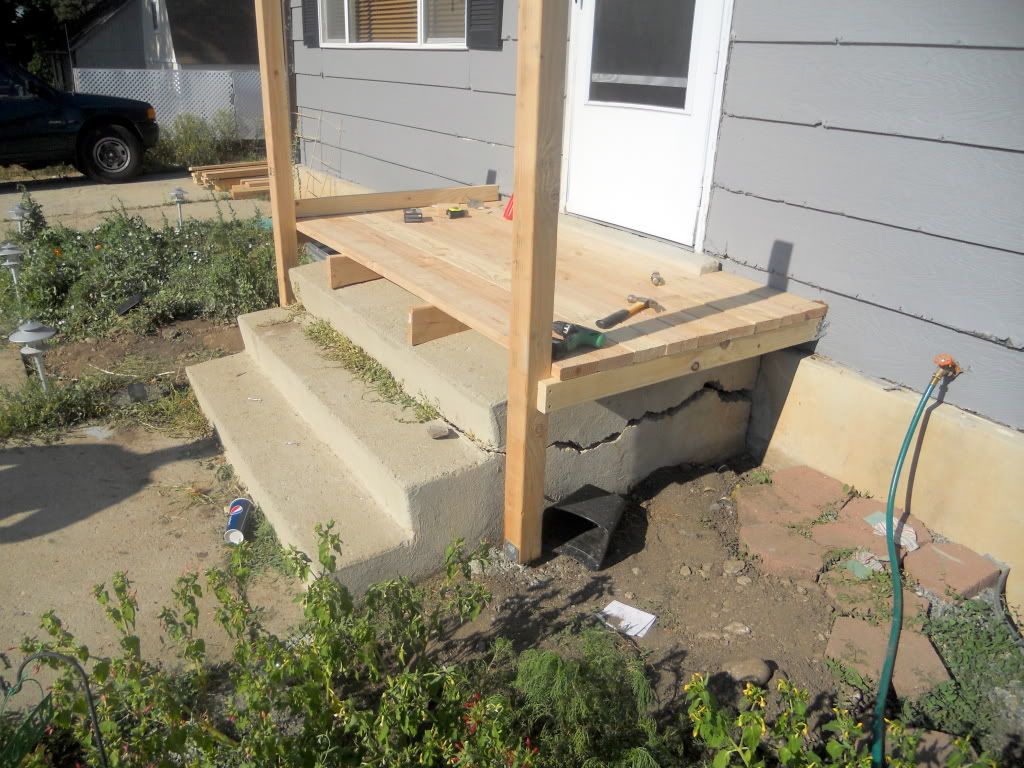
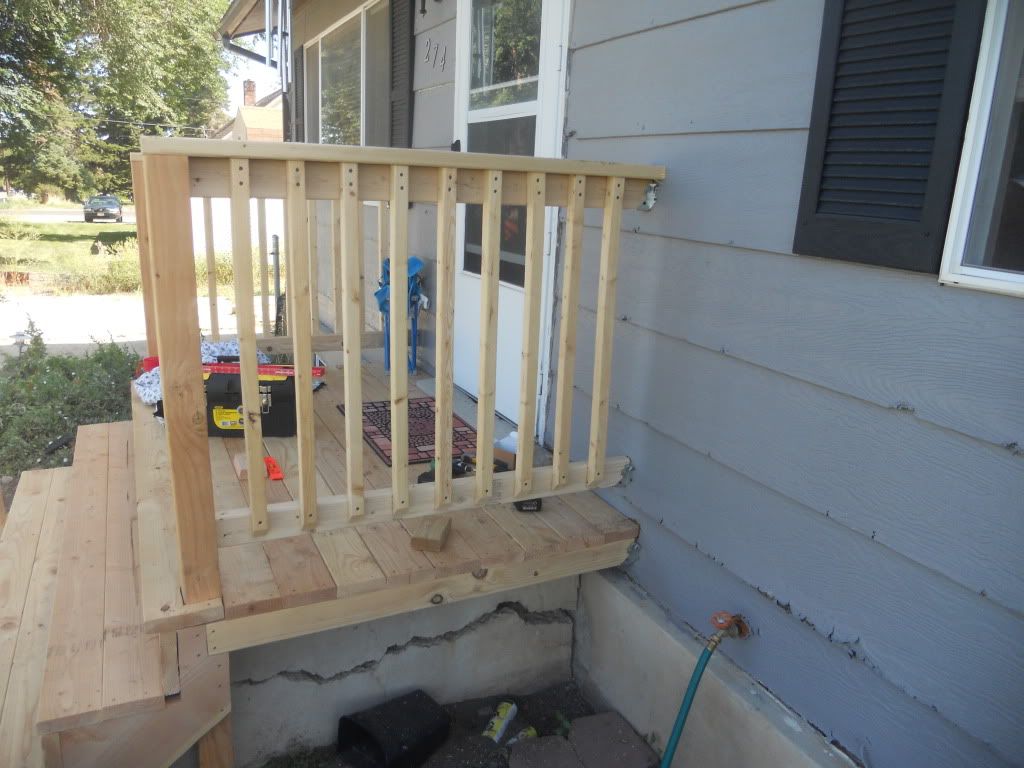
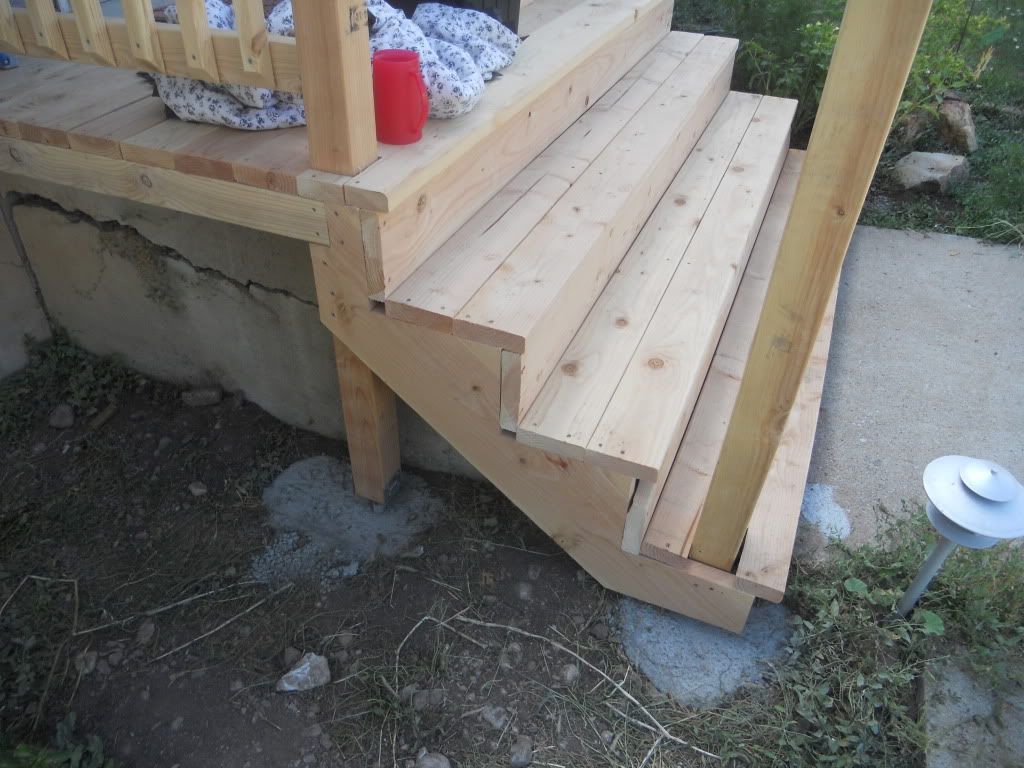
We couldn't put the other two posts in yet since the concrete hadn't cured completely, we started building the top platform.  Yes, it's perfectly level, as opposed to the concrete porch we are building over.  Notice any difference between the two?  yeah, it was 6 inches higher.  Crazy!

Another view of new porch over the previous one.  Awesome crack!

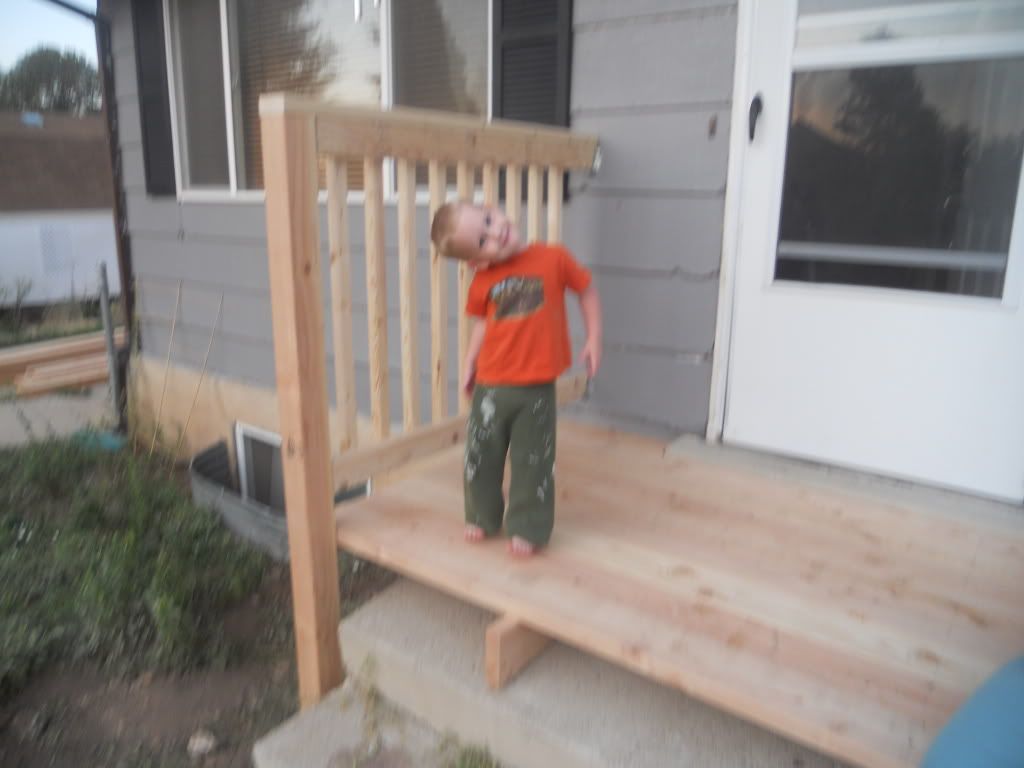
We had enough daylight to put up the railing on one side.

My little poser :)

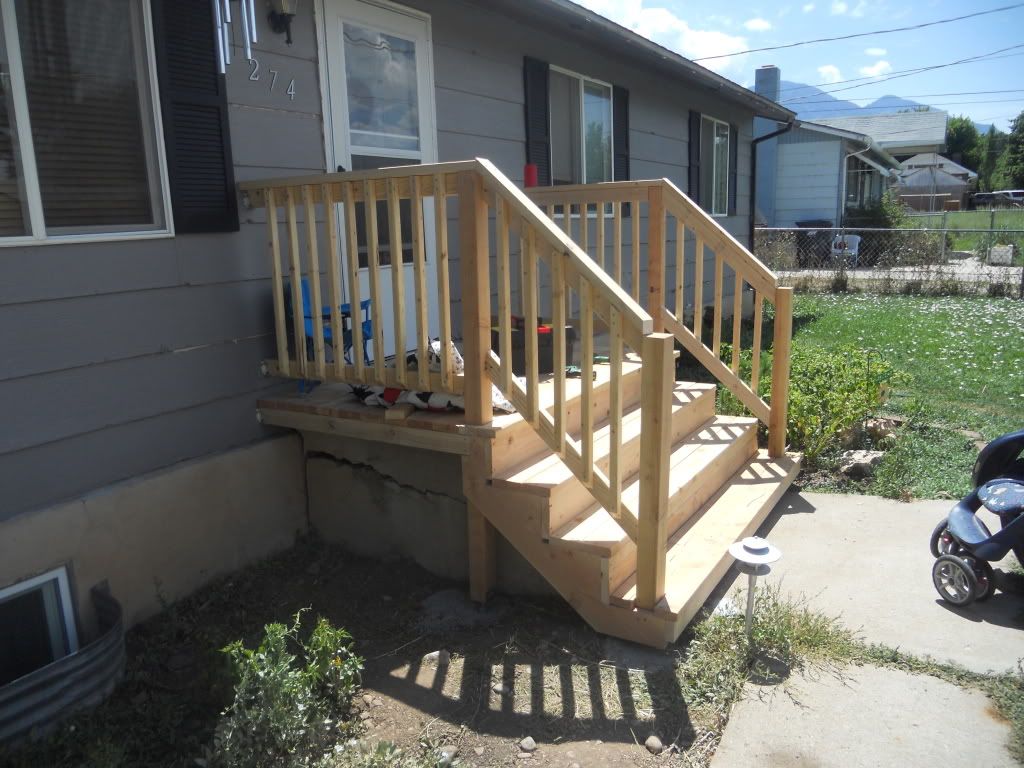
After work the next day, we were able to get the other side done.

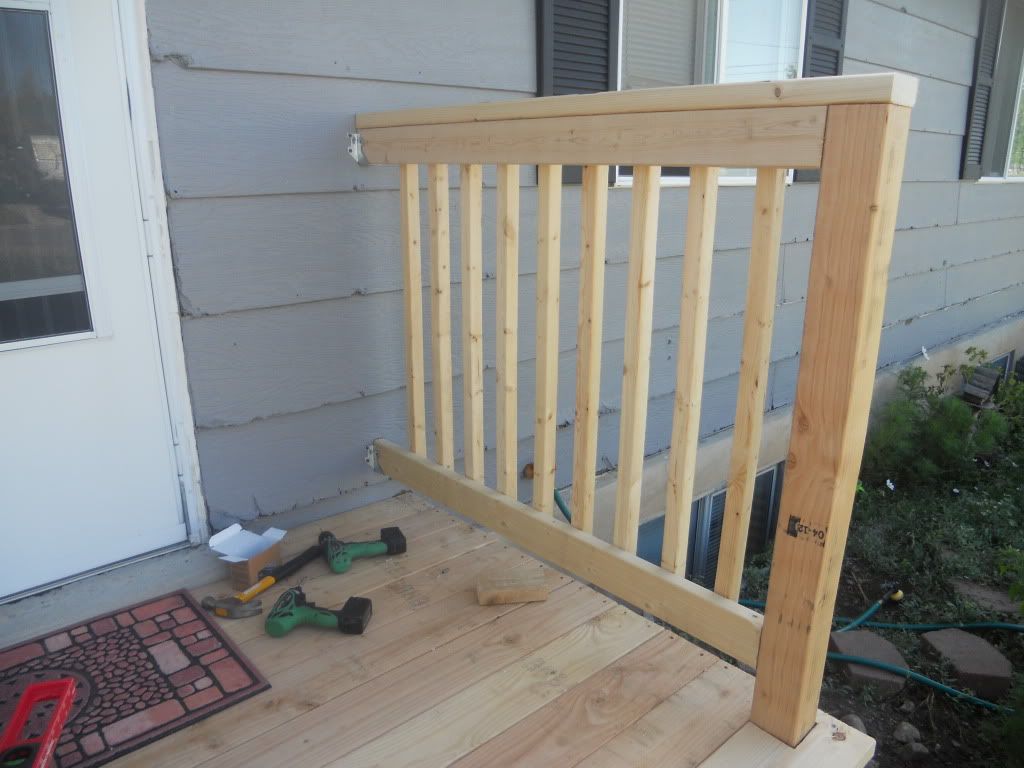
Looks pretty, doesn't it?

After a really stressful Saturday, we were able to get the stairs in.

We had to change plans a bit as we were building because my original measurements of the old porch were a bit off, and I needed to figure out new dimensions for the stairs - which meant we didn't have all the wood we needed.  But we made it work.


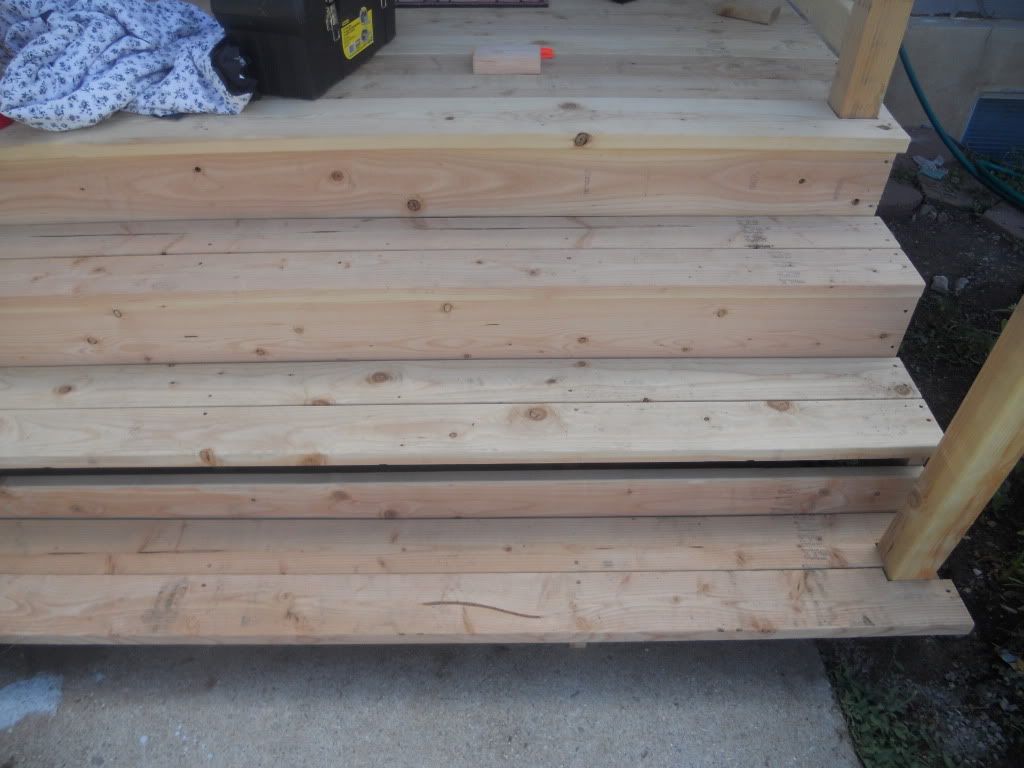
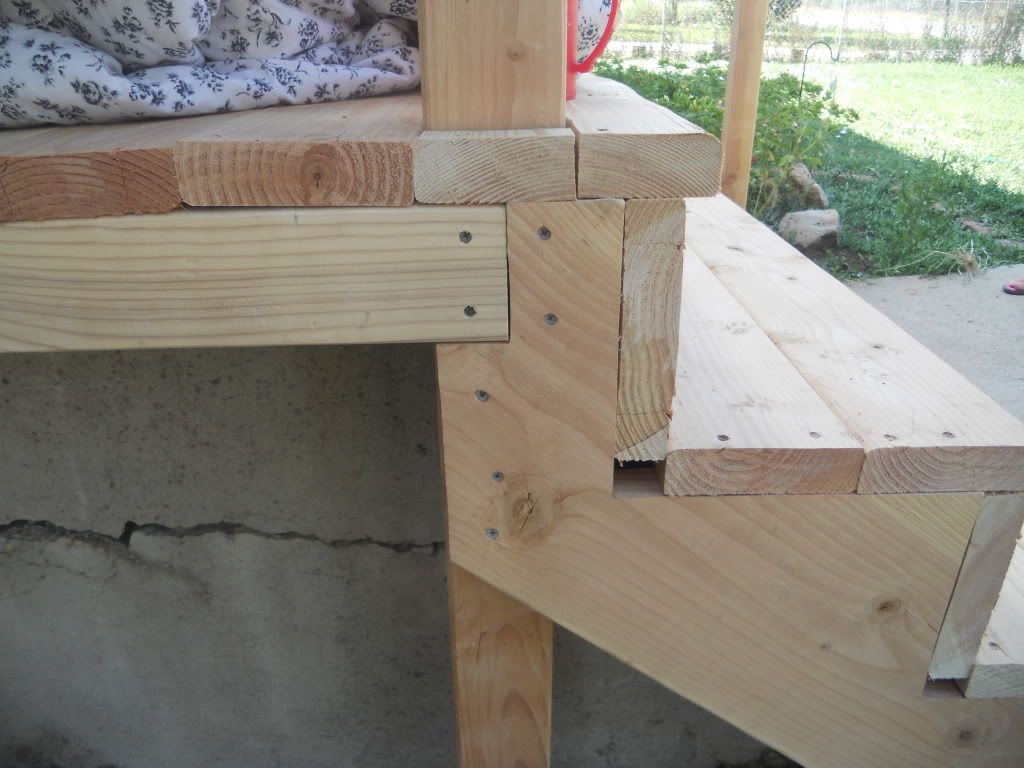
Josh absolutely loves this joint where the stair frame we made fits onto the post and the rest of the porch :)

Almost done!!!

After the walnut stain and sealant. 

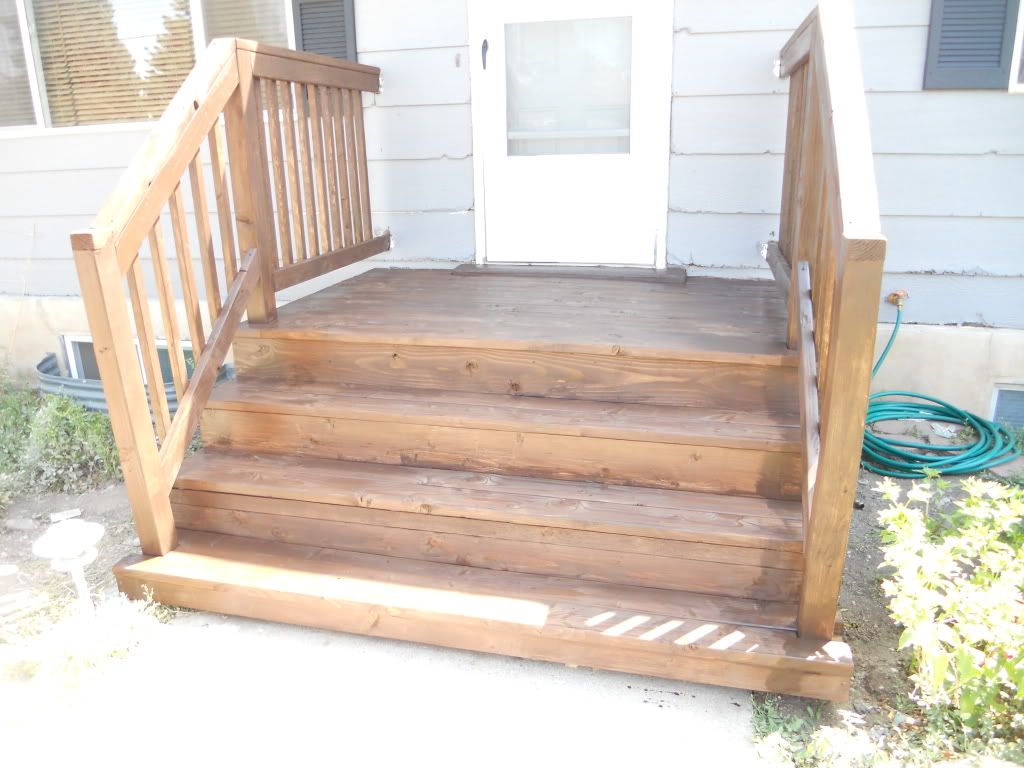
I love how dark it is.

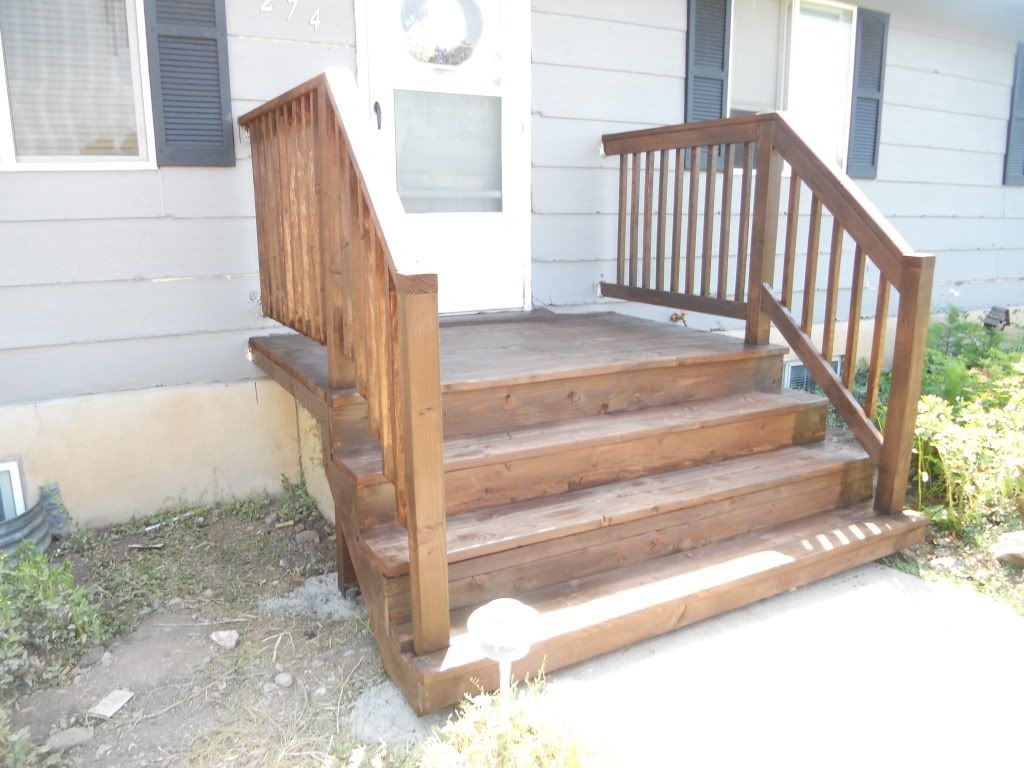
Finished product over the old porch *shudders*

LET'S REVIEW:


This is what our house looked liked when we bought it.  Gorgeous, right?  Or not...


And after a few renovations, this is what it looks like now!

Wednesday, April 18, 2012

Indoor Seed Starting - Part 1

Pin It
It's that time of year again!  Everyone is getting their gardens ready for planting in about a month, (here in Utah, we have to wait until around Mother's Day to be sure there won't be anymore surprise frosts/snows).  Last year, I got a ton of seed packets for free, and have been so excited to plant them!

Ever notice how quickly supplies for your garden add up?  Here are a few tips for saving money while starting your seeds:

For a few weeks before you start planting, save your used milk jugs, toilet paper rolls, or any other container you can find around the house that easily disposable.

HINT #1: Toilet paper rolls can be planted directly into your garden along with the seeds!

When you're ready to plant your seeds, cut up your containers and lay them out on pans/etc that can be used for the drainage to seep (I used old pans, lids, anything I could find not in use in my kitchen - they can always be washed).

HINT #2:  use as much of the container as you can - I got 2 "planters" out of every toilet paper roll and milk jug, and 5 out of a paper towel roll, and 3 out of a 2 Liter bottle.


Then drill holes in the bottoms of each "planter".  Notice above how not all of my planters have bottoms - THIS IS OKAY, and you don't have to drill anything with them; just make sure there is something underneath the containers.


(As you can see, I also experimented with old muffin tins to see how they would work, even though I didn't make a way for them to drain).

Next, will each "planter" with potting soil, but not all the way to the tops.

HINT #3: I was able to get potting soil at the dollar store! SCORE!  I just needed 1 1/2 bags (.5 cubic foot each) for everything you see here.

Then plant your seeds according to the packaging.

NOTE:  This is NOT the final resting place of your seeds, so you can plant them closer than on the package, since you will be thinning them out later.  In fact, I just sprinkled mine in the containers like seasoning.  Just make sure they are planted at the correct depth.

Water your seeds daily, allowing the water to seep out the bottoms of the containers (they will soak it up throughout the day), and watch them grow!

NOTE:  It is important that the containers have a drainage system so that the seeds do not literally drown in the water, but are able to drink it up continually.  My muffin tins have no drainage system at all, and as such the soil ends up floating when I put just a little water in them.  Things are still growing, but I have to water them a little differently to compensate.

HINT #4:  Use a heat lamp to increase the growth rate.  The picture below was taken only 4 days after planting the seeds (click to enlarge):

HINT #5:  When placing your seeds indoors, make sure they have plenty of natural light through a window.

HINT #6:  Place the empty seed packets in the containers you planted those seeds, so you don't end up guessing later!


As my seeds mature, and it comes time to plant them in the garden, I will have updates on what to do next, and how everything turned out in my experimental containers :)

Sunday, April 15, 2012

Healthy "Cream Cheese"

Pin It
This week's post is a "Mommy How To Lose Weight" edition!

If you're like me, you are always trying to lose weight without excessive dieting and exercising (I do some, but I'm not committed to a gym or one-hour workouts, and I love food too much to give that up!)  And if you are also like me, then you LOVE the sweet stuff (aka desserts, sweets, candy, chocolate, etc etc etc).  Unfortunately, those sweet things don't work out so well if you need to lose weight.

So the other day I was scouring the internet for ideas, and read something about food substitutions (found here).  The idea to substitute cottage cheese for cream cheese intrigued me - because I love making cheesecake, frosting, tortilla rollups, etc with it, but don't always have it on hand; but I do usually have cottage cheese.  And if it's healthier, why not give it a try?!
So I did.  And the results were amazing!  I've only done a couple things with it so far (no cheesecakes yet), but other than it being a bit runnier, it works out wonderfully!

TIPS:
Use SMALL CURD cottage cheese.
BLEND the cottage cheese well before use.
If making a cheesecake, only use cottage cheese if you are going to bake it.
Drain the cottage cheese using cheese cloth to lessen how runny it gets.

Still don't believe it will work?  Blend it up, and give it the smell/taste test yourself!  You'll be amazed at the similarities!


Thursday, April 5, 2012

Wall Night Light

Pin It
My son has recently let his imagination grow to the point that monsters now exist, and this means his current night lights aren't enough at bedtime.  He's been asking me to leave his bedside lamp on, but it's so bright that when he wakes up in the middle of the night, it keeps him up (aka Mommy doesn't get as much sleep).  My solution? Turn that lamp into a wall-mounted night light!


Wall Night Light


Step 1: Take old lamp apart.  Just take the shade off, the light bulb out, and unscrew the base so that you can move the wires freely.  My lamp was pretty basic, and in order to get the wires out of the base, I just had to "unplug" them from the socket the lightbulb is screwed into.  While doing this, make sure you mark or remember which wires go where, so you can put them back once the base is completely off the wires (afterall, you want the light to work again).


Step 2: Make a box.  I would normally break out the leftover wood I have lying around the house and build a box, but I lucked out and had part of a game set that had all its pieces missing, so I just reused that.  If you do build a box, just make sure it's about 10-12 inches square, and will leave enough width for the lightbulb to fit inside without touching the walls.  Also, you'll want to put a hole in the bottom for the wires to feed through.


Step 3: Attach light to box.  Run the wires up through the hole, then reattach them to the socket, and the lightbulb to the socket. Using hot glue, I attached the shim onto the box, then hot glued the socket (where the lightbulb screws into) onto the wood. I had to use a shim (skinny piece of wood) to make sure my lightbulb wouldn't be touching the back of the box.

Step 4: Cover the box.  To create a dimmer light emanating from the box, I used a thin piece of scrap cloth.  You could also use tissue paper, rice paper, glass or plexiglass (frosted or painted to dim the light).  Make sure that if it is cloth, or similar material, that you leave enough extra around the edges to wrap around to the back of the box; otherwise, make sure the material you are using fits the size of the front opening of the box.

    Step 4a:  Wrapping the top.  Put a line of hot glue on the back of the box along the top edge, the wrap the cloth around from the front to the back, securing it along the glue line (see picture above).

    Step 4b:  Wrapping the bottom.  Next, make a slit in the cloth where the cord comes out. Make sure you only cut down to the where the cord will go through (do not cut too much, or it may go onto the front and ruin the project).  This time when gluing, only glue about 1 to 2 inches at a time, instead of the entire line.  As you do so, pull the fabric tight, using the glue to anchor the fabric down for your next section.

    Step 4c:  Wrapping the sides.  Put a 1-2 inch line of hot glue in the middle of one of the sides along the edge and wrap the cloth similarly as the top and bottom.  Do the middle of both sides before moving on to the rest of the side.  Don't worry about the corners until the next step.  Make sure you are pulling the fabric tight the entire time so that the front of the box will be wrinkle-free and not saggy.

    Step 4d:  Gluing the corners.  Pull the fabric of one of the corners to one side, similar to wrapping a present.  Then put a diagonal line of hot glue on the corner working towards the middle of the box.  Grab the corner and carefully wrap it around the other side and towards the line of glue.  Repeat this process for all 4 corners.


Step 5:  Preparing to hang the night light.  I used a drill with a 1/4" drill bit to cut some holes for the nail in the wall to hold onto.  I just drilled 3 holes right next to each other.  Then, I figured out where I wanted the light to hang in my son's room, and put a nail in the wall.  You could use those picture-hanging brackets, but I wanted the light fixture to be flush with the wall, and this seemed the easiest way for me to do it.


Step 6:  Show it off and have happy dreams!  My son thought it was really cool when I took him to his room and switched on the light.  Hopefully he'll forgive me for tearing his lamp apart so that we can both sleep peacefully through the night.  Good luck with your projects, and share with me your versions!

Tuesday, April 3, 2012

Welcome to Mommy How To's!

Pin It
Apparently as a stay-at-home mom, I tend to get bored, or need some type of creative outlet to de-stress from my normal day-to-day routine.  That's when I get creative.

My husband and I bought our first home a year ago, and absolutely love it!  However, it was a fixer-upper, and we are always on a tight budget.  Over the past year we have done so many things to update our home and decorate it, that now I can't seem to stop!  I'm always commenting on Facebook about what project I'm currently working on, and have since gotten lots of replies from people begging me to show them how to do what I'm doing.  That's why I created this blog.

Instead of taking up room in my family blog to give tutorials on all my creative endeavors, I decided to make a new blog for others to gander at my projects.  Now, understand I'm not a professional, I don't earn a living myself, I'm just a mom who likes to reuse, upcycle, and make things for my home and family.  That's why I named my blog "Mommy How To's."

I'm not always working on something, but I usually always have an idea I want to try.  I also go through stages where I make a ton of things at once.  So hopefully I'll have a new post at least once a week for you to enjoy.  If I don't, just be patient and realize I'm also a full-time wife and mother with a dog, cat, chickens, gardens, etc to take care of. I hope you read my blog, comment on my posts, share your creations with me, and otherwise just enjoy!